
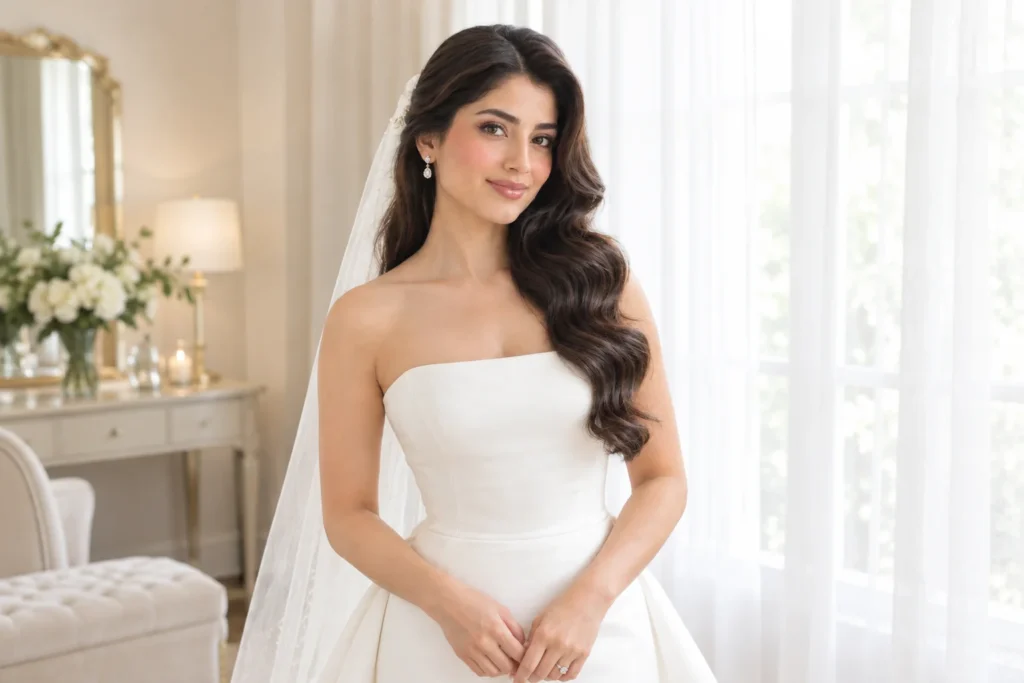
Every bride feels that. Wedding hair has a lot of pressure.These Tammy Hembrow wedding hair ideas give you ten polished, camera-ready styles. Each one comes with a clear formula, a pro tip, and a swap. You can screenshot one and hand it to your stylist.Ready to find your look?
What Actually Makes Tammy Hembrow Wedding Hair Work
This style is all about polish. Four things create it.
Shine comes first. Glossy hair photographs like silk. Use a finishing serum or gloss spray on every look.
Length is your canvas. Long hair lets you do sleek, wavy, or braided. Short on length? Clip-in extensions fill the gap.
Smooth roots matter. Clean parts and tight crowns make the whole style look expensive.
Hold beats volume. Your hair has to last eight hours of hugging and dancing. Prep and pins do that job.
1. The Sleek Low Ponytail
“I want polished hair that still feels like me.”

The Formula:
- Blow-dry hair straight with a round brush
- Brush a smoothing cream through the mid-lengths
- Gather hair at the nape with a boar bristle brush
- Secure with a clear elastic
- Wrap a thin hair section around the base and pin it
- Finish with shine spray
Why It Works: The low ponytail frames your neckline. It also keeps your veil in place. The clean line looks bold in photos.
Pro Tip: Spray a toothbrush with flexible hold spray. Smooth flyaways with it.
Best For: Straight to wavy hair. Wear it to a city hall or evening ceremony.
Make It Last: Add a pearl clip at the base for a dressier finish
2. Glossy Waist-Length Waves
“I want movie-star waves that don’t fall flat by the ceremony.”
![Bride with glossy waist-length waves in soft Hollywood style for wedding day]](data:image/svg+xml;base64,PHN2ZyB4bWxucz0iaHR0cDovL3d3dy53My5vcmcvMjAwMC9zdmciIHZpZXdCb3g9IjAgMCA3NjUgMTAyNCIgd2lkdGg9Ijc2NSIgaGVpZ2h0PSIxMDI0IiBidi1pbWctdXJsPSJodHRwczovL2hhaXJuYWlsZ2xvdy5jb20vd3AtY29udGVudC91cGxvYWRzL2FsX29wdF9jb250ZW50L0lNQUdFL2hhaXJuYWlsZ2xvdy5jb20vd3AtY29udGVudC91cGxvYWRzLzIwMjYvMTAvV29tYW5fdG91Y2hpbmdfaGFpcl9pbl9yb2JlXzIwMjYxMDEzMTcwOTAzLTEtNzY1eDEwMjQud2VicC5idi53ZWJwIiBidi1yZXNpemVkLWluZm9zPSJORGd3TG5kbFluQTZORGd3S2pZME16czRNakF1ZDJWaWNEbzRNakFxTVRBNU9Ec3hOVE0yTG5kbFluQTZPRGsyS2pFeU1EQT0iPjwvc3ZnPg== "10 Tammy Hembrow Wedding Hair Ideas for Glamorous Brides")
The Formula:
- Prep damp hair with heat protectant
- Blow-dry with a large round brush
- Curl one-inch sections with a 1.25-inch curling iron
- Pin each curl while it cools
- Release and brush through softly
- Mist with a glossing spray
Why It Works: Cooling the curls locks the shape. Brushing them out creates one smooth wave. This is the heart of Tammy Hembrow-style glam.
Pro Tip: Curl away from your face on the front sections. It opens up your features.
Best For: Long, fine to medium hair. Wear it to a ballroom reception.
Make It Last: Dust the roots with texture powder before the first dance
3. The Sleek High Ponytail
“I want a lifted look without a full updo.”

The Formula:
- Smooth the hair back with a paddle brush
- Tie it high at the crown
- Add a clip-in ponytail extension for length
- Wrap a section around the elastic
- Pin the wrap with two bobby pins
- Seal with a strong-hold spray
Why It Works: The high pony lifts your face and shows off earrings. It stays cool in hot venues.
Pro Tip: Tease the crown gently before you pull the pony tight. It adds lift.
Best For: Any texture. Wear it to a beach or garden wedding.
Swap It: Slide a satin ribbon around the base for a softer finish
Quick Pro TipBrush your ponytail from underneath before you tie it. You get a cleaner line and fewer bumps.
4. The Half-Up Glam Crown
“I want some volume but I hate heavy updos.”
![Half-up glam crown bridal hair with loose waves and jeweled pins]](data:image/svg+xml;base64,PHN2ZyB4bWxucz0iaHR0cDovL3d3dy53My5vcmcvMjAwMC9zdmciIHZpZXdCb3g9IjAgMCA3NjUgMTAyNCIgd2lkdGg9Ijc2NSIgaGVpZ2h0PSIxMDI0IiBidi1pbWctdXJsPSJodHRwczovL2hhaXJuYWlsZ2xvdy5jb20vd3AtY29udGVudC91cGxvYWRzL2FsX29wdF9jb250ZW50L0lNQUdFL2hhaXJuYWlsZ2xvdy5jb20vd3AtY29udGVudC91cGxvYWRzLzIwMjYvMTAvV29tYW5fc2VhdGVkX2F0X3ZpbnRhZ2VfdmFuaXR5XzIwMjYxMDEzMTcyMzUyLTc2NXgxMDI0LndlYnAuYnYud2VicCIgYnYtcmVzaXplZC1pbmZvcz0iTkRnd0xuZGxZbkE2TkRnd0tqWTBNenM0TWpBdWQyVmljRG80TWpBcU1UQTVPRHN4TlRNMkxuZGxZbkE2T0RrMktqRXlNREE9Ij48L3N2Zz4= "10 Tammy Hembrow Wedding Hair Ideas for Glamorous Brides")
The Formula:
- Add volume at the crown with velcro rollers
- Section hair from ear to ear
- Twist the top section back
- Pin it with crisscross bobby pins
- Leave the lower hair in loose waves
- Add two small jeweled pins
Why It Works: You get a lifted crown and free-flowing length. The hold stays light, so your scalp stays comfortable.
Pro Tip: Use pins that match your hair color. They disappear in photos.
Best For: Medium to long hair. Wear it to a church ceremony.
Make It Last: Spray the pinned section lightly with hairspray. It will not droop.
5. The Low Bun with Face-Framing Pieces
“I want an updo that still looks soft.”

The Formula:
- Part hair in the middle or slightly off-center
- Pull out two thin face-framing strands
- Gather the rest into a low twisted bun
- Pin the bun flat against the nape
- Curl the framing pieces with a flat iron
- Brush shine serum over the top
Why It Works: The bun shows off your neckline. The loose strands soften your face. It reads as classic and modern.
Pro Tip: Use a bun donut under the twist. It gives you fullness with thin hair.
Best For: Medium to long hair. Wear it with a strapless or high neck dress.
Make It Last: Tuck a small floral comb beside the bun.
Common Mistake
Brides pull their buns too tight. The result looks stiff and gives them a headache by noon. Leave a little slack at the crown. Then pin the base firmly.
6. Soft Beach Waves for Outdoor Weddings
“I’m marrying outside and I need hair that handles wind.”

The Formula:
- Apply sea salt spray to damp hair
- Air dry or diffuse to 80 percent
- Wave sections with a 1.5-inch iron
- Leave the ends straight
- Shake out with your fingers
- Mist with flexible hold spray
Why It Works: Loose texture hides wind tangles. The waves move with you. Your photos look natural and fun.
Pro Tip: Skip heavy serum at the roots. It makes the style flat in humidity.
Best For: Medium to long hair. Wear it to a beach or vineyard ceremony.
Swap It: Pin one side back with a pearl barrette for a dressier finish.
7. The Wrapped Braided Ponytail
“I want something detailed that still looks clean.”

The Formula:
- Pull hair into a high or mid ponytail
- Braid the ponytail into a three-strand braid
- Pull the edges gently to widen the braid
- Wrap a small section around the base
- Pin the wrap in place
- Add a gold cuff or ribbon
Why It Works: The braid adds texture without frizz. It stays secure through dancing. It also looks great from the back.
Pro Tip: Spritz the braid with texture spray before you widen it. It holds the shape.
Best For: Long hair, all textures. Wear it to a rustic or destination wedding.
Make It Last: Tie the end with a clear elastic. Hide it under a ribbon.
“Wear the look that makes you feel like the main character.”
8. Side-Swept Old Hollywood Curls
“I want drama for my evening reception.”

The Formula:
- Part hair deeply on one side
- Set curls with a 1-inch curling iron
- Pin each curl in a flat coil
- Cool for ten minutes
- Brush out into one smooth wave
- Pin the heavy side behind the ear with a gem clip
Why It Works: The deep part creates a dramatic line. The sculpted wave looks formal and bold.
Pro Tip: Brush from the roots outward in short strokes. This builds the finger-wave shape.
Best For: Medium to long hair. Wear it to a black-tie wedding.
Swap It: Pin the curls into a low roll for an updo version.
9. Pearl-Pinned Silk-Straight Hair
“My hair is naturally straight and I want that to feel special.”

The Formula:
- Blow-dry hair smooth with a paddle brush
- Flat iron in thin sections
- Apply a glossing serum from mid-length to ends
- Tuck one side behind the ear
- Pin three pearl bobby pins in a diagonal line
- Spray lightly with shine mist
Why It Works: Pin placement adds a focal point. Smooth hair reflects light, which gives that glass-hair finish.
Pro Tip: Do a heat-free prep the night before. Braid damp hair loosely to build body.
Best For: Straight or silk-pressed hair. Wear it to a modern courthouse or minimalist wedding.
Make It Last: Keep a travel-size serum in your clutch.
Shortcut
Grab a flat iron, a rat-tail comb, and a bottle of shine spray. You already own what you need for half of these looks.
10. The Messy-Chic Updo with Curtain Bangs
“I want an updo with a relaxed, effortless vibe.”

The Formula:
- Curl hair loosely with a 1.25-inch iron
- Twist hair up into a loose chignon
- Pin it at the crown
- Pull out a few strands at the neck
- Shape curtain bangs with a round brush
- Finish with a flexible spray
Why It Works: Curtain bangs frame your eyes. The loose bun adds charm and stays comfortable all night.
Pro Tip: Pin the chignon before you pull out strands. This keeps it secure.
Best For: Medium to long hair. Wear it to a garden party or brunch wedding.
Swap It: Replace pins with a satin scrunchie for a rehearsal dinner look.
One honest note from me: I once styled a bride whose curls dropped before the vows. We fixed it with a fast hairspray mist and a pin. Always keep a backup kit nearby.
Frequently Asked Questions
How do I get Tammy Hembrow-style hair for my wedding?
Start with long, healthy hair and a glossing treatment a week before. Ask your stylist for sleek waves or a smooth ponytail. Bring photos. Add clip-in extensions for extra length. Finish with shine spray for that polished, glassy look.
How long does bridal hair take?
Plan for 60 to 90 minutes for a sleek ponytail or waves. Updos and braids take 90 to 120 minutes. Add extra time for extensions. Book your stylist for the earliest slot so your photos start on time.
Can I wear a veil with a sleek ponytail?
Yes. Place the veil comb just above the ponytail base. Pin it through the elastic wrap. For a cathedral veil, secure it with two extra bobby pins. Ask your stylist to test the placement during your trial.
How do I keep my waves from falling flat?
Cool every curl before you brush it out. Use a heat protectant and a flexible hold spray. Skip heavy oils at the roots. Carry a travel hairspray in your bag for touch-ups.
Should I get a hair trial before my wedding?
Yes, book one four to eight weeks before the date. Wear a similar neckline and your veil. Take photos from every angle. Note what lasted and what slipped. Your stylist can then fix issues early.
Final Thoughts
Glamorous hair starts with one clear choice. Pick the style that fits your dress, your venue, and your energy.
Every look here uses simple tools and smart prep. You do not need a perfect routine. You need a plan and a stylist you trust.
Save this guide to your wedding board so it is ready for your trial. Which look are you picking: sleek ponytail or Hollywood waves?